This tutorial will show you how to make fancy bling bling text with Photoshop 6.0+. The method (and nearly all of the text) came from juggopop.com. (I only bothered to put it up because the juggopop tutorial disappeared for a while. A newer, better version of the original tutorial is available directly from juggopop.com.) I'm recreating the images.
1. First thing you need to do is open a blank image. I'm using 400 x 400 (RGB) in this tutorial so it will fit better on this page, but, you should always start Bling Text larger than you really think you will need it. It works better larger & can always be sized down.
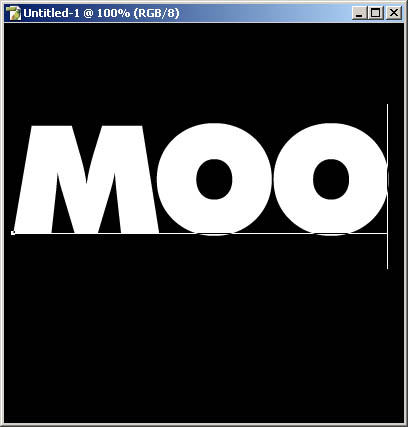
After you get that open... fill the image with BLACK.
Next you need to pick the text tool and pick a nice THICK font... wide fonts do better.
2. I have picked my font... I am using Futura Extra Black at a size of 150pt. You will need to type your word in WHITE somewhere in the middle.
This will cause photoshop to make the text on a new layer. This new layer will be named the same as your word. After you type your word click the gradient tool.
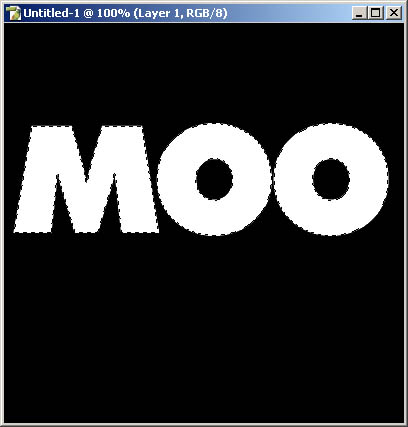
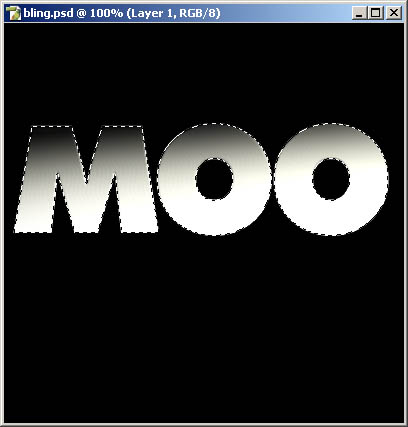
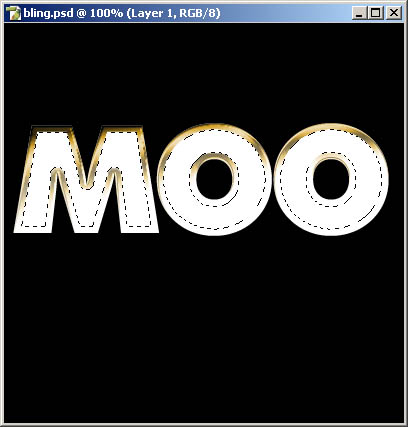
3.) Now, CTRL CLICK the layer with your text on it. This will select the area. Click the new layer icon in the layers tray.
You now have a blank layer with the outline of your word selected. Do not deselect it... this is the layer where the magic will happen.
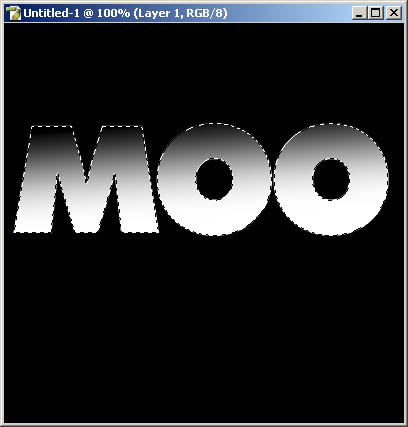
Now take the gradient tool (with black to white) click the top of the selected area, hold shift and drag your mouse to the bottom of the area.
When done correctly it should look like the image below.
4.) Now... with the layer still selected, go to Filter> Render > Lighting Effects.
Choose the settings below or settings close to those. Make sure you pick 2 O'clock spotlight and the correct texture channel. I've cheated and saved the settings.
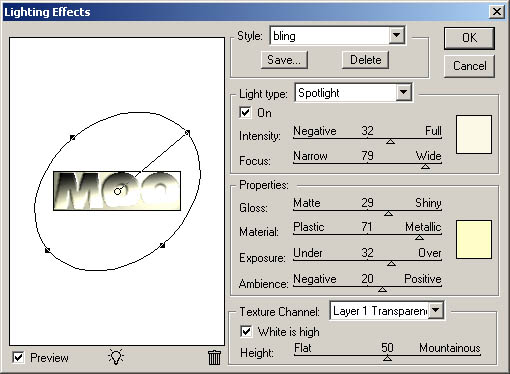
When you are done it should look like the image below.
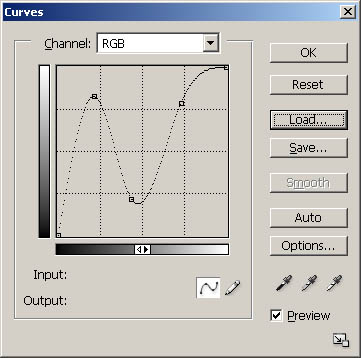
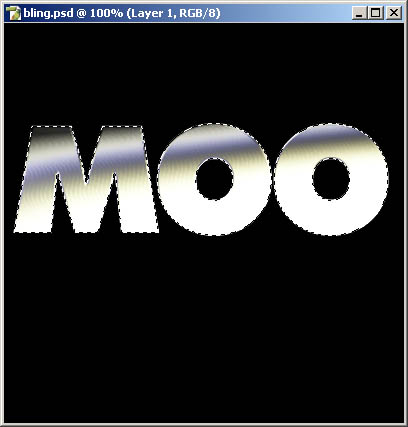
5.) This step makes it really look shiny. Make sure you still have the section selected... then go to Image > Adjust > Curves. Choose the settings shown below or settings close to those.
When you are done it should look something like this:
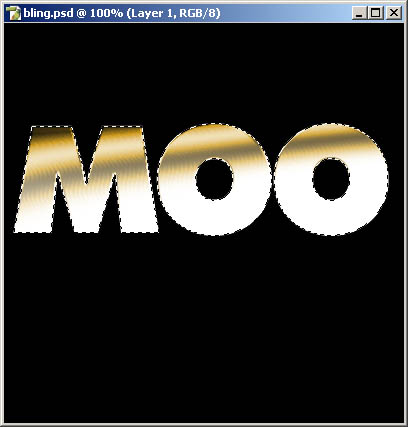
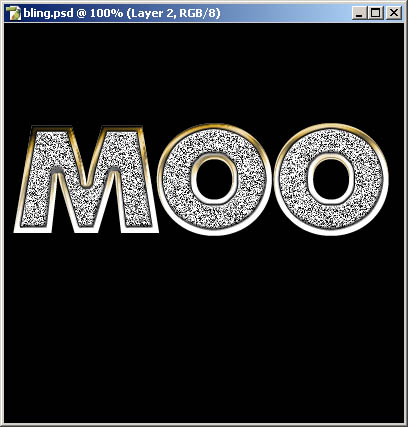
6.) Next... go to Image > Adjust > Hue/Saturation.
Choose these settings:
Colorize box CHECKED
Hue 41
Saturation 71
Lightness 0.
After that is done it should look like the image below- a lovely "cheezy gold."
7.) Now comes the Diamonds (sort of)... the part that puts the "BLING" in the "bling".
Make sure you area is selected (ctrl + Click layer)
Go to Select > Modify > Contract.
Contract it by 6 if you can... you will learn how much and how little to do with practice, it depends a lot on the font and how much you actually can. In my example I did 6.
Click the new layer icon in the layers tray.
Go to Edit > Fill (then fill it 100% white)
It should look like the image below:
8.) Next... Filter > Noise > Add Noise, set it to 40%, Gaussian CHECKED, Monochromatic CHECKED.
Press CTRL+F two times... (this is just a quick way of doing the same effect more than once)

9.) We are almost done... You need to double click the layer of the diamonds... this will open the layer styles menu.
Click Stroke... change the color to black and the size to 1... click Bevel and Emboss change the style to pillow emboss and the angle to -117 (or whatever you think looks good, smaller height of the diamonds look better than over embossed).
Then just add some sparkly bits, crop and resize, and you're done!
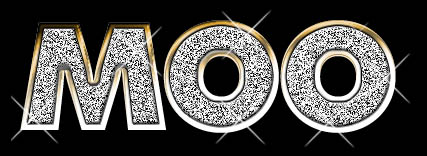
Now you are ready to be blingtastic. Thanks, juggopop!
Other ways to bling:
Photoshop Cafe
Gangsta Bling
PDavies (almost the same as the one on this page)